Japanese Sewing Books - Translating and Tracing
We have welcomed some new Japanese sewing books into the store (not online yet), and they are beautifully designed. However they do have a small stumbling block, they are all written in Japanese. But technology is a wonderful thing and Google Translate has made reading these patterns so easy.
Translating Books
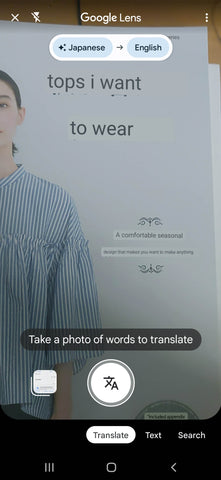
We have put together a little video on how to use it if you haven't used it before, but it really is as simple as googling, 'Google Translate', on the page there is a section that says Enter Text, and on the right hand side a little Camera and Microphone. If the Camera icon does not appear (it didn't on our instore ipads), you will have to download the app.

I clicked on the camera, pointed it at the text I wanted to read and if like magic, the English words appeared. This gives the ability to be able to both follow the illustrations and read the words!
You can also download the Google Translate app directly to your device for easy access. Here is a video on how we use it in the store.
Tracing Patterns
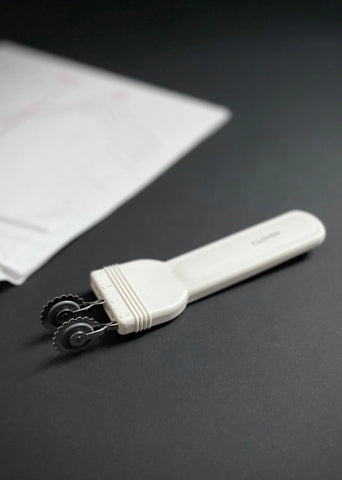
The patterns in the books need to be traced - and most also need to have a seam allowance added. Fortunately we have a tool for that as well, the Clover Double Tracing Wheel. It is a simple tool to use, the wheels are movable so you can decide the seam allowance that you want, in the video we have it set to 1.5cm.
You can use tracing wheels with carbon paper, but we prefer to use the wheel to create indentations in our tracing paper that we can then mark with a pencil. To do this we:
- Lay a piece of fabric out on our table to protect the surface - a sheet or piece of calico or similar will do. Nothing precious - there may be some marks left in the fabric
- On top of the fabric lay out your pattern paper
- Then finally place your pattern sheet.
- Place one wheel on the line you want to trace and then ensure the other wheel is on the outside of the line to add the seam allowance. You don't want the wheel to be on the inside of the pattern as this will mean you will be making it smaller!

This image is to show you where to place the wheels.
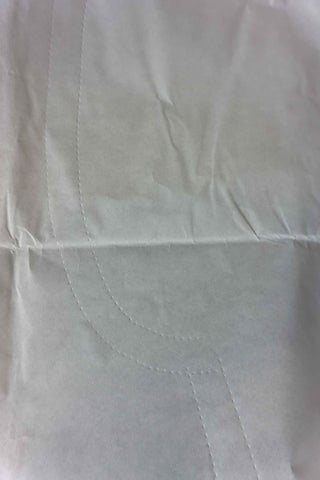
When you have finished the indents will look like this.
You can then use a pencil to draw over the outer line you have created. Don't forget to also add in other pattern markings such as notches and grainline!
We have also put together a video to show you how to use it which we hope you find helpful!
If you don't have a tracing wheel you can simply place your tracing paper over the pattern and trace off with a pencil. Use a ruler to add seam allowances as needed.