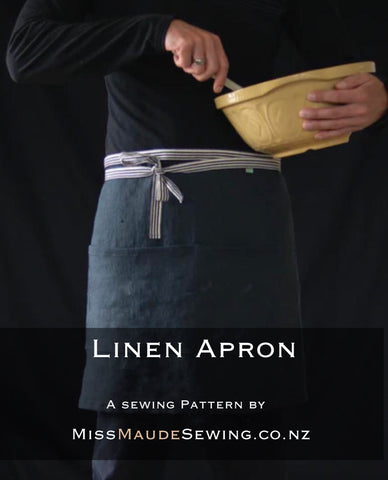
Linen Apron - a sewing pattern by Miss Maude

This simple linen apron made up in our European Laundered Linen with Cotton Tape ties and features deep front pockets making it both practical and stylish. Beautiful in its simplicity, the detailing on this pattern will give you a durable apron that is just as beautiful on the inside as it is on the out. Mitred corners, reinforced pockets and no sign of a raw edge in sight!
Make this as a gift for the foodie in your life, but then again you may just want to keep it for yourself!
 Suggested Fabrics
This has been designed for our European Laundered Linen Fabrics in store, but it would work just as well with any medium weight linen such as our mid-weight Maison Linen Fabric. The range of heavier weight Washer Linen Fabric would also work really well for this apron. We class a medium weight fabric as one that weighs between 180gsm and 250gsm.
If you wanted a heavier, more worker style apron for a home DIYer that can withstand something more than cooking, then our heavier Denim Fabric, Cotton Canvas or Oilskin Fabric would be perfect and create a really unique apron!
Sizing
One size fits most, designed to wrap around the body. Finished dimensions: 91cm wide x 46cm long. This is easily customisable to suit.
You will need:
- 1/2 metre of 140cm wide Medium Weight Linen fabric
- 2.5 metres of Cotton Tape or similar for ties (Unfortunately we have sold out of the tape pictured in the photos and have linked to the cotton tape we do have.)
-
Matching Thread

Before you start: It is recommended that you prewash or soak your fabric and cotton tape to ensure any shrinkage happens before you cut!
Cutting:
Cut two rectangles - one for the pocket and one for the main apron.
Cut the following sizes:
Pocket: 45cm wide x 22cm deep
Apron: 95cm wide x 50cm deep
Sewing
Prepare Pocket:
Create a mitred corner in each bottom corner of the pocket fabric by folding each of the bottom corners towards the inside to create small right angled triangles with sides 20mm long.
 Press.
On each side and the bottom of the pocket, fold 10mm in towards the wrong side.
 Press.
 Finish the top edge of the pocket by folding it in towards the wrong side twice. Each fold should be about 12mm.
 Press.
 Top stitch the top of the pocket, 10mm from the edge.

Attach pocket:
Fold both the pocket and apron in half to find the centre front of each piece.
Aligning the centre fronts, pin the pocket to the apron 18cm down from the top edge.

Edge stitch around the sides and bottom of the pocket,
 Pivot with the machine needle down at each corner.
 Start and finish your stitching at each top corner of the pocket with a half arrow-head to add strength. See the photo below for detail.
 Add a second row of topstitching 5mm inside the edge stitching. Again pivot at the corners and add a half arrow-head at the top corners.
 You will end up with a small cross in each top corner.
 Mark the centre line of the pocket with tailor's chalk (test chalk first on a scrap of fabric to ensure it will easily brush off).
 Topstitch, following the line to create two front pockets. Stitch a small triangle at the top of the pocket to add strength.
 Mitre apron corners and finish edges:
On the side and bottom edges of the apron fold 10mm towards the wrong side.
 Press.
Open the folds - at the bottom corners and where the two fold lines meet, cut off a small right angled triangle.
 Refold and press.
 As you did with the pocket, fold each of the bottom corners towards the inside to create small right angled triangles with sides 24mm long.
Press.
 On each side and the bottom of the apron, fold 12mm in towards the wrong side.
 Press.
 Topstitch 10mm from the edge along the sides and bottom of the apron.

Prepare the Cotton Ties:
Finish each end of the cotton tape by folding over twice and topstitching.

Aligning the centre of the apron and cotton tape, pin the tape to the apron with wrong sides facing. The raw edge of the apron should sit along the middle of the tape. Baste in place.

Turn over and edge stitch to join the tape to the apron.
Remove basting stitches.
 Fold tape over to the right side of apron.
Press.
 Top stitch in place.
 And you are done! But to give or to keep? Let us know!

SAVE IT FOR LATER....
2 comments
Thanks Veronica!! We would love to see your finished item! Happy Sewing!! Caroline, Miss Maude Sewing
Brilliant! Thank you for the generous offer which I shall certainly be making up ASAP.