How to Lengthen a sewing pattern piece
One of the joys of sewing our own clothes is being able to make things just how we like. Often that means making things a little shorter or longer. If you are wanting to alter the length of a pattern piece that is not a simple square/rectangle you'll want to make the length adjustment somewhere in the middle of the pattern piece. Doing so ensures the hem line stays the same circumference and you maintain the overall design style of the garment.
This tutorial shows you how to lengthen a pattern piece - we've used the Vali Dress as an example. You can see our Vali Dress pattern review here.
If you lengthen a pattern, don't forget you will likely need to purchase extra fabric. You will normally need twice the added length extra in fabric.
You will need:
- pattern piece(s) to be lengthened
- selotape or glue
- pattern paper or tracing paper
- we've used our Pattern Graph & Tracing Paper
- paper scissors
- ruler and marking pen
Step 1. Determine how much you want to lengthen your pattern piece by and where you need to add the length. Some patterns will have lines already marked on the pattern piece to indicate ideal areas to lengthen or shorten.
If not, make sure to select a point in your pattern that won't adversely impact the fit or style of the garment. Take into account key fit and style points such as hip, waist, bust, knees, elbows.
For example if you have a long torso, you might need to add length above the waist line. Conversely if you want to make a dress/top longer and it fits well through the bust and waist - make sure you lengthen the pattern below the waist or hip line.
If you are looking for a fantastic reference guide on fit alterations, we highly recommend Kenneth D King's Smart Fitting Solutions
For our example, we want to lengthen the Vali Dress - we like the fit, but just want some extra length through the leg area. We've chosen to lengthen the pattern at a point below the pocket.
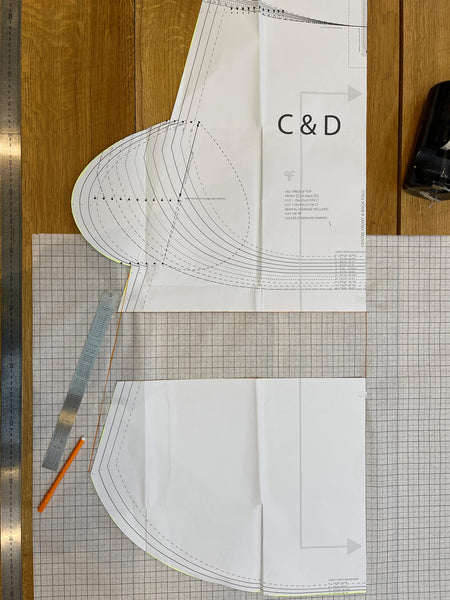
The images below show step by step how to do this - we used our new Pattern Graph & Tracing paper. The 1cm grid on the paper makes it a breeze and ensures the pattern pieces are correctly aligned with each other.

Step 2. Line up the centre front with the grid on the pattern paper. Mark your lengthen (or shorten) line at right angles to the centre front - orange line in image above.
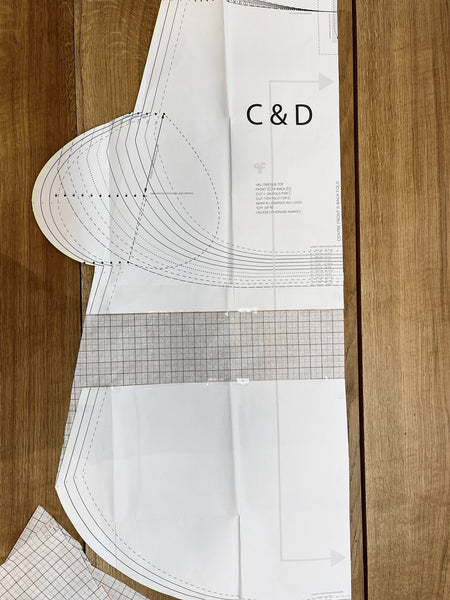
Step 3. Cut along the lengthen line, then seperate the two pattern pieces by the distance that you want to lengthen your dress. Make sure to keep the centre front of each piece lined up on the same grid line. Also make sure to keep both pattern pieces parallel to each other.
Step 4. Re-draw the side seam of the pattern piece. Here we have a straight line from just below the pocket to the beginning of the hem curve.
Step 5. Cut out your new pattern piece. Do the same to the Back pattern piece, and voila! You're good to go.
2 comments
So pleased we’ve been able to make this clear for you Bettie!
When I found this tutorial, I thought, ‘Finally, no more struggling with <a href=""http://www.epsilonpatternsandgrading.com/"">sewing patterns lengths!’ I was also wondering how to alter those non-square sewing patterns, and you’ve nailed it! I appreciate you for providing a clear example and detailed instructions, really helps me to understand the process.